Security is always important in our industry especially here at the university where I work. Recently we have been setting up SSL for a lot more of our basic sites so I found two good ways to do this depending on whether the host was IIS 6 or IIS 7. I’m assuming you have SSL up and working on the website, if you don’t there are many tutorials that show how to do this, some of the most helpful ones are provided by the SSL vendor’s documentation.
IIS 6 Force SSL
Theory: IIS does have the option to force SSL however when the non-SSL site is visited it will display a 403.4 error. Using a custom error page you can have the client redirect to the SSL site which does work. This uses client side redirection, you can do this both for IIS 6 or 7 but there are server side redirects that are possible in IIS 7 which are faster and preferred.
Setup: Create Javascript SSL Redirect Page
Create the “redirectSSL.html” document in “C:\Inetpub\”
<!-- beginning of redirectSSL.html file -->
<script type="text/javascript">
function redirectToHttps()
{
var httpURL = window.location.hostname+window.location.pathname;
var httpsURL = "https://" + httpURL ;
window.location = httpsURL ;
}
redirectToHttps();
</script>
<!-- end of redirectSSL.html file -->
Assign Permissions
Right click on the file and select “Properties” then go to the “Security” tab.
Add your Internet Guest Account to have read and execute permissions on this file. The name of the account is structured as “<computer name>\IUSR_<computer name>”. This allows you website users the ability to read this file and get the redirection.
Force SSL
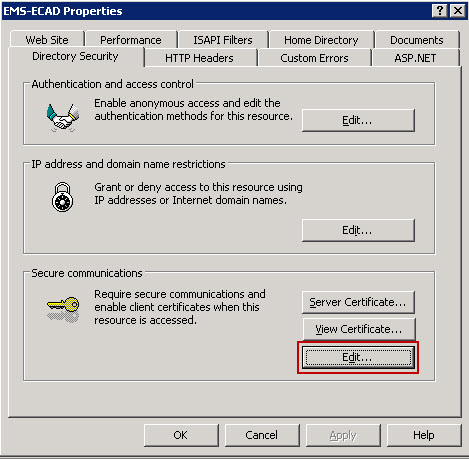
Right Click on your website and select “Properties”, then go to the “Directory Security” tab. Under the “Secure communications” click on the “Edit…” button.

Check “Require secure channel(SSL)” and “Require 128-bit encryption” and press “OK” at the bottom.
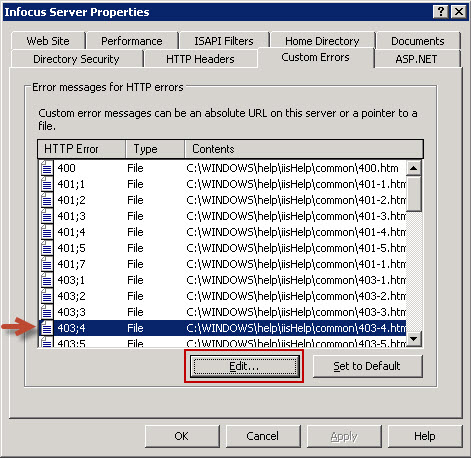
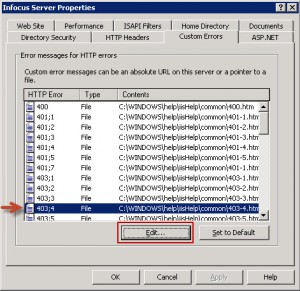
Setup Custom Error Client Redirection
Select the “Custom Errors” tab and click on the “403;4” HTTP Error item and click “Edit..” at the bottom.
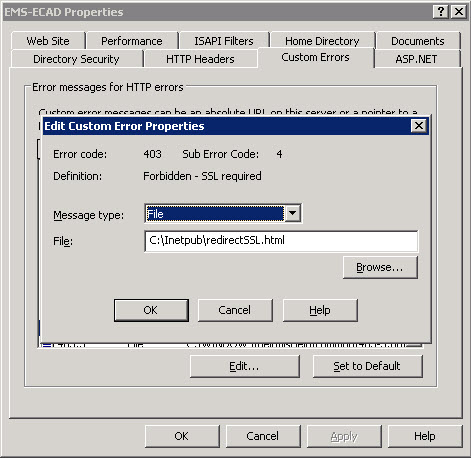
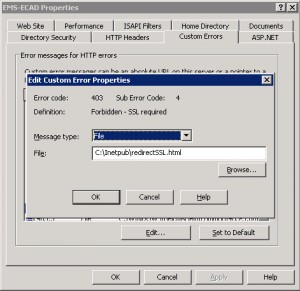
Select “File” from the Message type dropdown and enter “C:\Inetpub\redirectSSL.html” in the File field and press OK.
Done!
IIS 7 Force SSL
Thankfully IIS7 is much better and easier to configure.
Theory: IIS7 has server side redirection as a module and we will be adding some custom website configuration to redirect all http traffic to the https site. This is faster than the client redirection as it doesn’t require the client to get two webpages to get to the SSL site.
Prerequisites: This requires the Microsoft URL Rewrite Module be installed on the server.
Method 1 – Use IIS Manager GUI
In IIS Manager, Click on your website and Select “URL Rewrite” from the Features View.
Next Click “Add Rules(s)…” from the Action Pane on the Right.
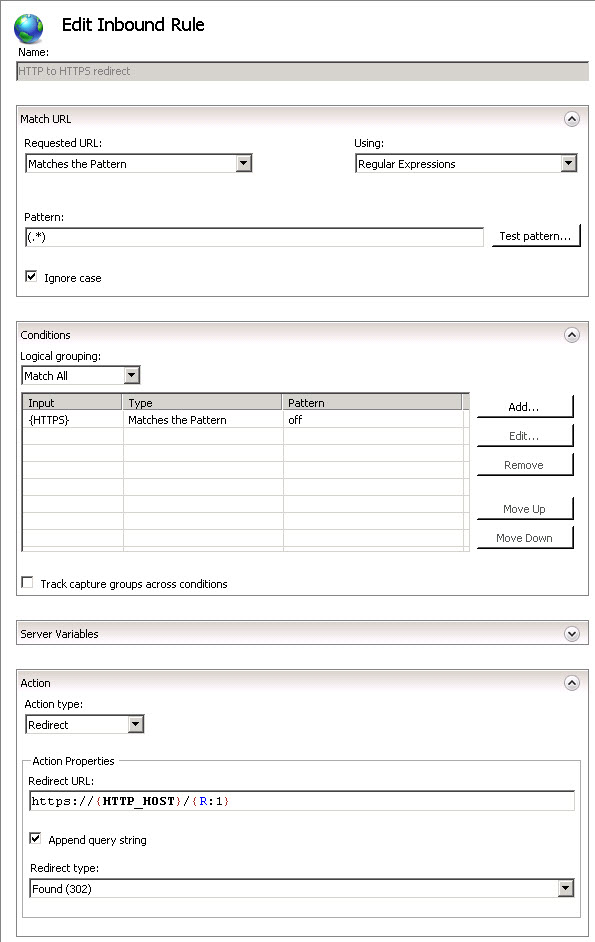
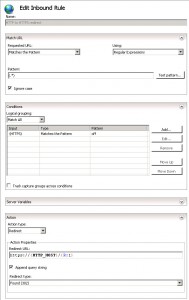
Setup the rule as shown in the following image:
Method 2 – Configure web.config File
Browse to the root of your website and open the web.config file and edit it to match the following:
<configuration>
   <system.webServer>
      <rewrite>
         <rules>
            <rule name="HTTP to HTTPS redirect" stopProcessing="true">
            <match url="(.*)" />
             <conditions>
             <add input="{HTTPS}" pattern="off" ignoreCase="true" />
             </conditions>
             <action type="Redirect" redirectType="Found" url="https://{HTTP_HOST}/{R:1}" />
            </rule>
          </rules>
       </rewrite>
   </system.webServer>
</configuration>
Both of these methods do the exact same thing.
Done!
Read More