How to Disable Weak SSL Protocols and Ciphers in IIS

I recently undertook the process of moving websites to different servers here at work. This required that university networking group scan the new webserver with a tool called Nessus. Unfortunately this turned up several errors, all of them had to do with Secure Sockets Layer or SSL which in Microsoft Windows Server 2003 / Internet Information Server 6 out of the box support both unsecure protocols and cipher suites. These problems would have to be solved before they would allow the new server though the firewalls. The report they university sent me was generated by Nessus generated errors like this:

SSL Version 2 (v2) Protocol Detection

Synopsis :

The remote service encrypts traffic using a protocol with known
weaknesses.

Description :

The remote service accepts connections encrypted using SSL 2.0, which
reportedly suffers from several cryptographic flaws and has been
deprecated for several years. An attacker may be able to exploit
these issues to conduct man-in-the-middle attacks or decrypt
communications between the affected service and clients.

See also :

http://www.schneier.com/paper-ssl.pdf
http://support.microsoft.com/kb/187498
http://www.linux4beginners.info/node/disable-sslv2

Solution :

Consult the application's documentation to disable SSL 2.0 and use SSL
3.0 or TLS 1.0 instead.

Risk factor :

Medium / CVSS Base Score : 5.0
(CVSS2#AV:N/AC:L/Au:N/C:P/I:N/A:N)

Nessus ID : 20007
----------------------------------------------------------
SSL Medium Strength Cipher Suites Supported

Synopsis :

The remote service supports the use of medium strength SSL ciphers.

Description :

The remote host supports the use of SSL ciphers that offer medium
strength encryption, which we currently regard as those with key
lengths at least 56 bits and less than 112 bits.

Note: This is considerably easier to exploit if the attacker is on the
same physical network.

Solution :

Reconfigure the affected application if possible to avoid use of
medium strength ciphers.

Risk factor :

Medium / CVSS Base Score : 4.3
(CVSS2#AV:N/AC:M/Au:N/C:P/I:N/A:N)

Plugin output :

Here are the medium strength SSL ciphers supported by the remote server :

Medium Strength Ciphers (>= 56-bit and < 112-bit key)
SSLv2
DES-CBC-MD5 Kx=RSA Au=RSA Enc=DES(56) Mac=MD5
SSLv3
DES-CBC-SHA Kx=RSA Au=RSA Enc=DES(56) Mac=SHA1
TLSv1
EXP1024-DES-CBC-SHA Kx=RSA(1024) Au=RSA Enc=DES(56) Mac=SHA1 export
EXP1024-RC4-SHA Kx=RSA(1024) Au=RSA Enc=RC4(56) Mac=SHA1 export
DES-CBC-SHA Kx=RSA Au=RSA Enc=DES(56) Mac=SHA1

The fields above are :

{OpenSSL ciphername}
Kx={key exchange}
Au={authentication}
Enc={symmetric encryption method}
Mac={message authentication code}
{export flag}

Nessus ID : 42873
--------------------------------------------------------------------
SSL Weak Cipher Suites Supported

Synopsis :

The remote service supports the use of weak SSL ciphers.

Description :

The remote host supports the use of SSL ciphers that offer either weak
encryption or no encryption at all.

Note: This is considerably easier to exploit if the attacker is on the
same physical network.

See also :

http://www.openssl.org/docs/apps/ciphers.html

Solution :

Reconfigure the affected application if possible to avoid use of weak
ciphers.

Risk factor :

Medium / CVSS Base Score : 4.3
(CVSS2#AV:N/AC:M/Au:N/C:P/I:N/A:N)

Plugin output :

Here is the list of weak SSL ciphers supported by the remote server :

Low Strength Ciphers (< 56-bit key)
SSLv2
EXP-RC2-CBC-MD5 Kx=RSA(512) Au=RSA Enc=RC2(40) Mac=MD5 export
EXP-RC4-MD5 Kx=RSA(512) Au=RSA Enc=RC4(40) Mac=MD5 export
SSLv3
EXP-RC2-CBC-MD5 Kx=RSA(512) Au=RSA Enc=RC2(40) Mac=MD5 export
EXP-RC4-MD5 Kx=RSA(512) Au=RSA Enc=RC4(40) Mac=MD5 export
TLSv1
EXP-RC2-CBC-MD5 Kx=RSA(512) Au=RSA Enc=RC2(40) Mac=MD5 export
EXP-RC4-MD5 Kx=RSA(512) Au=RSA Enc=RC4(40) Mac=MD5 export

The fields above are :

{OpenSSL ciphername}
Kx={key exchange}
Au={authentication}
Enc={symmetric encryption method}
Mac={message authentication code}
{export flag}

Other references : CWE:327, CWE:326, CWE:753, CWE:803, CWE:720

Nessus ID : 26928
-----------------------------------------------------------------

These three error messages pretty much mean that you need to turn off SSL 2.0 due to exploits that were found after the standard was created. You need to turn off any encryption suites lower than 128bits. The third error message says we need to turn off anything for less than 56bits, but this will be accomplished by turning of anything less than 128bits. Basically your are modifying the settings that restrict the use of specific protocols and ciphers that are used by the schannel.dll. More detailed information can be found at Micorsoft’s KB187498 or KB245030

How do we do this?

Disabling SSL 2.0 on IIS 6

  1. Open up “regedit” from the command line
  2. Browse to the following key:
    HKLM\SYSTEM\CurrentControlSet\Control\SecurityProviders\SCHANNEL\Protocols\SSL 2.0\Server
  3. Create a new REG_DWORD called “Enabled” and set the value to 0
  4. You will need to restart the computer for this change to take effect. (you can wait on this if you also need to disable the ciphers)

Disable unsecure encryption ciphers less than 128bit

  1. Open up “regedit” from the command line
  2. Browse to the following key:
    HKLM\SYSTEM\CurrentControlSet\Control\SecurityProviders\SCHANNEL\Ciphers\DES 56/56
  3. Create a new REG_DWORD called “Enabled” and set the value to 0
  4. Browse to the following key:
    HKLM\SYSTEM\CurrentControlSet\Control\SecurityProviders\SCHANNEL\Ciphers\RC2 40/128
  5. Create a new REG_DWORD called “Enabled” and set the value to 0
  6. Browse to the following key:
    HKLM\SYSTEM\CurrentControlSet\Control\SecurityProviders\SCHANNEL\Ciphers\RC4 40/128
  7. Create a new REG_DWORD called “Enabled” and set the value to 0
  8. Browse to the following key:
    HKLM\SYSTEM\CurrentControlSet\Control\SecurityProviders\SCHANNEL\Ciphers\RC4 56/128
  9. Create a new REG_DWORD called “Enabled” and set the value to 0
  10. You will need to restart the computer for this change to take effect.

How to verify the changes?

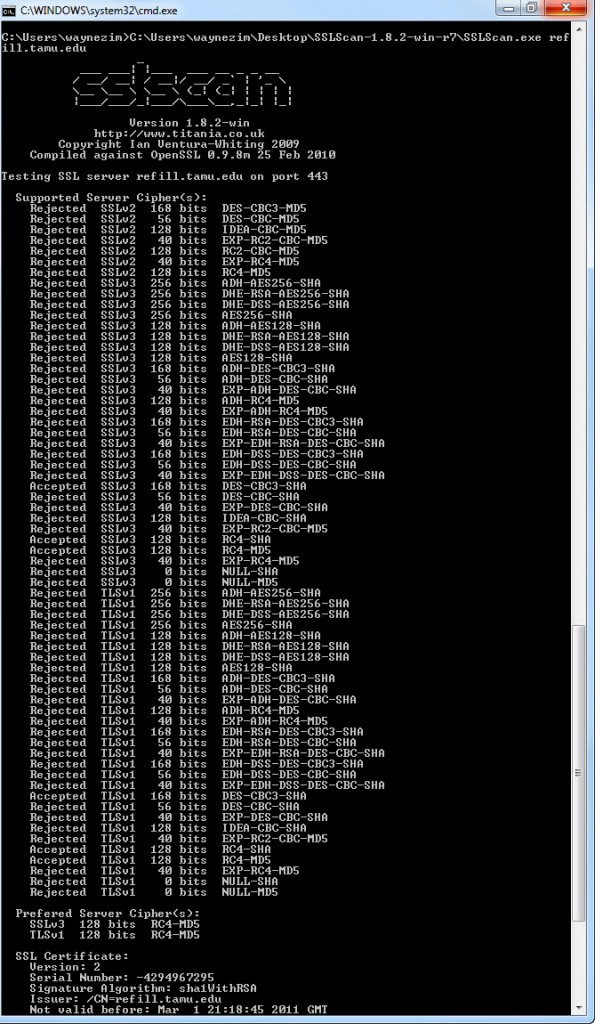
Now that you have made these changes how can you be sure that they have taken place without having to go to your boss or higher authority just to find that you did them wrong. Well I found a nice tool called SSL-SCAN which you can download at http://code.google.com/p/sslscan-win/ for the Windows port or you can download an compile for your favorite operating system at the original project SSL-SCAN siteĀ http://sourceforge.net/projects/sslscan/. This tool provides some great detail about what is allows and not allows plus some analysis of the SSL certificate itself.

Below the screen shot shows that we have disabled any ciphers that attempt to use the SSL 2.0 protocol and we’ve disabled all ciphers that less than 128bit.
Read More

How to export MySQL database to MSSQL using phpMyAdmin

Using phpMyAdmin to export data has always been very useful to me, however I found when trying to run the SQL scripts it generates for Microsoft SQL server I found that there is a variety of incompatibilities. This is further compounded by the Microsoft SQL Management Studio that is a much improvement over the previous Enterprise Manager however it seems to fair badly when trying to do bulk inserts. I ran into many out of memory issues when trying to execute large SQL scripts over 25 megabytes. I also tried using the sqlcmd to try to have it directly process the files but it also ran into memory issues. I choose to use SQL scripts rather because this makes it easy to get back to the original database if needed.

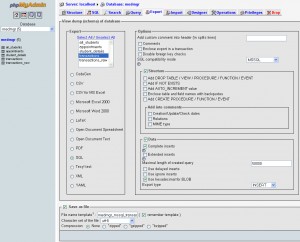
phpMyAdmin Export Config
Exporting from phpMyAdmin
Select your database and then go to the Export tab. You will need to change the following options to have it export SQL file that is mostly compatible with MSSQL.

  • Change the export type to SQL
  • Under Options – Uncheck Comments, Change the SQL compatibility mode to MSSQL
  • Under Structure – Uncheck Add IF NOT EXISTS, ADD AUTO_INCREMENT value, Enclose table and field names with backquotes
  • Under Data – Uncheck Extended inserts

These options will ensure that the INSERT lines will be valid when importing.

Data Structure / Table Definitions
phpMyAdmin does not intemperate data definitions to be compatible. So you have to options here, use Microsoft Management Studio to create your tables or modify the SQL script to be compatible. Here are is an example of a definition that I fixed and what I did.

phpMyAdmin export Microsoft SQL Compatible
CREATE TABLE transactions (
id int(11) NOT NULL,
medmgrid float NOT NULL,
medmgridpri int(11) NOT NULL,
medmgridsub int(11) NOT NULL,
“date” date NOT NULL,
department int(11) DEFAULT NULL,
“type” text NOT NULL,
detail text,
doctor int(11) DEFAULT NULL,
“procedure” text,
description text,
reference_date date DEFAULT NULL,
diagnosis text,
unit float DEFAULT NULL,
amount float DEFAULT NULL,
total float NOT NULL,
PRIMARY KEY (id)
);
CREATE TABLE transactions (
id int IDENTITY(1,1)PRIMARY KEY,
medmgrid float NOT NULL,
medmgridpri int NOT NULL,
medmgridsub int NOT NULL,
“date” datetime NOT NULL,
department int DEFAULT NULL,
“type” text NOT NULL,
detail text,
doctor int DEFAULT NULL,
“procedure” text,
description text,
reference_date datetime DEFAULT NULL,
diagnosis text,
unit float DEFAULT NULL,
amount float DEFAULT NULL,
total float NOT NULL
);
  • ID Field is AUTO_INCREMENT in MySQL, for MSSQL use “IDENTITY(1,1)PRIMARY KEY”
  • INT does not allow specificaton of lenght, remove these entries “(11)” after each INT
  • DATE is not a valid datatype for MSSQL, replace with DATETIME
  • Any Data Field name that is also a Keyword for MSSQL needs to be Double Quoted
  • Remove ANY comments from the phpMyAdmin export, even if you didn’t check this there still maybe some in there. Be sure to check the end of the file for them.

For other datatype issues you may need to consult – http://webcoder.info/reference/MSSQLDataTypes.html and check to see if it is even a valid data type. Most datatype errors are easily resolved by Googling the error that is returned.

Data Insertion
If you have used phpMyAdmin export specifications from earlier in this article your data should mostly script in just fine. However, you may need to encase any of your Data Field names with double quote if the word is also a keyword. For example I have used the word Procedure which requires double quote or MSSQL thinks you are calling a stored procedure. To do this I would suggest a program called TextPad that not only does really fast replacements and can do it across multiple files but also is able to handle a few hundred megabyte text file with ease.

If you are using an AUTO_INCREMENT field you will need to add “SET IDENTITY_INSERT field_name ON;” line in before inserting any entry that tries to set that field to a specific value. This happens when your AUTO_INCREMENT ID field has already been created from MySQL. If you don’t do this you will receive an error of “Cannot insert explicit value for identity column in table ‘field_name’ when IDENTITY_INSERT is set to OFF.”

When doing bulk inserts you will be required to keep your single SQL file < 25 megabytes. Microsoft SQL Management Studio will prompt you with "The operation could not be complete. Not enough storage is available to complete this operation" or "System.OutOfMemoryException". To divide up these files I used a free program appropriately called TextWedge which was able to handle up to 100MB SQL files and easily divided them up. You may have to open SQL Studio, execute one 25MB SQL script then close and repeat depending on how much data you have to move.

Read More

How to Remove H8SRT Trojan / Rootkit TDSS

The H8SRT Rootkit is a modification to the TDSS Trojan that installs a driver to hide itself, hijacks Internet Explorer, gives fake security and virus warnings, redirects search queries and major site access, as well as disables Task Manager, Registry Editor and blocks most anti-spyware applications. Not only does it disrupt normal use of the computer but also does a good job at trying to keep you from removing it by disabling the tools you would need.

I’m not sure how I got this little bug but it was one of the most stubborn apps that I had seen in quite a while. The hardest part about this is that it won’t let you download or execute applications that are used to remove it or identify what malware I had on my system. When I come across malware I typically go download MalwareBytes Anti-malware (MBAM) and run it and problem solved, however this time it wouldn’t download the application until I renamed it to just a generic “Setup.exe” and saved it. After it was installed I then was unable to execute it as “mbam.exe” I had to rename it to “notepad.exe” which then allowed me to execute it. Once I got it to run it removed some of the fake AV items, but after a few reboots and even safe mode the H8SRT Trojan was still on my computer. I did a bit of internet research and found out that Kaspersky has created a removal tool for TDSS.Rootkit which the H8SRT Rootkit is based. Once I downloaded and ran the Kaspersky tool: TDSSKiller, I follow up with another round of MBAM and now my system is clean.

Download TDSS Killer: http://support.kaspersky.com/downloads/utils/tdsskiller.zip
Kaspersky Documentation on TDSS Killer: http://support.kaspersky.com/viruses/solutions?qid=208280684
Kaspersky Free Virus Removal Tools: http://www.kaspersky.com/removaltools
Download MBAM: http://www.malwarebytes.org/mbam-download.php

Read More

How to Set Permission on a Service Using Subinacl

A couple of months back I was installed some communication software that made a VPN connection to the main server. It used OpenVPN to establish the connection and worked fine as long as your were an administrator on the PC. As I researched it further it installed a service and required that service to run on demand when the user launch the program. Since your standard limited user does not have privileges to start and stop services the application would fail to connect to the server.

So now the question becomes, how do you add permissions to a service?

Microsoft has an answer with a little known command line application called subinacl. This application allows you to view and edit security information for files, registry keys, and services. This can be handy if you are writing a script to change permissions on registry keys or files but the real power lies within the ability to edit the security information on services.

The syntax for subinacl: SUBINACL /SERVICE \\MachineName\ServiceName /GRANT=[DomainName\]UserName[=Access]

The Access parameter is broken down like this:

F : Full Control
R : Generic Read
W : Generic Write
X : Generic eXecute
L : Read controL
Q : Query Service Configuration
S : Query Service Status
E : Enumerate Dependent Services
C : Service Change Configuration
T : Start Service
O : Stop Service
P : Pause/Continue Service
I : Interrogate Service
U : Service User-Defined Control Commands

For my example I just needed to allow the Domain Users group access to run the OpenVPN service.

subinacl /service OpenVPN /GRANT=DOMAIN\Domain Users=TO

You may need to execute this from the folder where subinacl.exe is located. Also if it is running the command on a local system you can just type the name of the service and not the UNC path to the service.

Download subinacl.exe from Microsoft
For more information about this command please visit: http://support.microsoft.com/kb/288129

Read More

Quickly Cleanup Your Windows Server Update Service (WSUS) with Just a Few Clicks

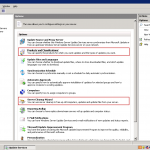
WSUS-Cleanup-03 If your like me you have that special date that Microsoft releases updates marked on your Outlook calendar. Once a month you go to the update server and approve updates and move along with your IT day. Well there is a little bit of maintenance that needs to be done to WSUS. First off you need to go and check to see what product categories you are subscribed to. This will ensure that you are receiving updates only for the products that you support in your environment. To do this open up your WSUS administrative console and click on Options in the tree menu on the left. If you do not see these options you may need to update your WSUS to 3.0. From the menu then select Products and Classifications.

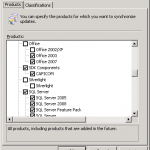
Now Scroll though this list of products and makes sure that any of the products you support has a check by it. If you have moved everyone off of the older version of the product you can uncheck it as well. WSUS-Cleanup-02I probably wouldn’t adjust anything in Classifications as the defaults here are relatively acceptable. Once finished press OK at the bottom.

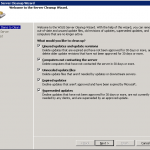
Next we need to cleanup the server and remove any old updates. To do this from Options select Server Cleanup Wizard. Ensure that the options are correct and just click Next.

This should remove old updates from the database as well as updates that have been updated and clean up any computers that haven’t contacted the WSUS server in 30 days. It may take a few minutes to process depending on how large your WSUS database and update archive has grown to.WSUS-Cleanup-01 It saved me about 20% when I adjust off Office 200 and a few other products we didn’t support and got rid of all of those updates that had been updated or not approved.

Enjoy a nice clean WSUS server!

Read More