Install Windows XP on Dell Optiplex 755 / 760 / 960 without AHCI SATA Driver

Since it looks like Windows XP will still be hanging around for at least a few more months, I thought I should share one of the cool tricks that I have found when installing it to theses newer Dell computers that have difference mode SATA controllers. Coming from the factory most PCs will come with Vista on it and be have the SATA controller in AHCI mode. Vista has drivers to use the controller in this mode, however Windows XP doesn’t. And since most computers don’t ship with a floppy and won’t recognize a flash driver when installing XP your only option is to slipstream the driver on to the Windows XP CD to make it boot the PC. Well with these newer Dells you have the option to go in to the BIOS and change in what mode the SATA controller operates. You should see options for ATA mode / AHCI mode and RAID mode. By selecting the ATA mode you can use the drivers already supplied by default on the Windows XP CD, once you get it installed you can use the Windows Device Manager to update the drivers to the AHCI ones. Below are the detailed instructions on how to install the AHCI driver once you have Windows installed by changing the SATA controller to ATA mode.

  1. Download the correct AHCI driver from support.dell.com website. The driver should be called “Intel Matrix Storage Manager (OS Pre-Install Driver Only)” or something close to that
  2. Restart the PC and press F8 repeatedly to boot the computer to Safe Mode
  3. Open up the device manager and locate the current SATA controller (Intel(r) ICH10 Family 4 port Serial ATA Storage Controller) it will probably show 2 of them
  4. Right click on the first one and select Update Driver
  5. When the wizard pops up select No, not this time > Install from a list or specific location (Advanced) > Don’t Search. I will choose the driver > Have Disk button
  6. Browse to the Drivers you downloaded and select the file named iaStor.inf, now uncheck the Show compatible hardware
  7. You should now be presented with a list of drivers, this is where trial and error comes in. You will need to select the correct driver for your chipset. Here is a list of what I have for the AHCI driver for each model.
       Dell Optiplex 960 – Intel(r) ICH10D/D0 SATA AHCI Controller
       Dell Optiplex 760 – Intel(r)ICH10D/D0 SATA AHCI Controller
       Dell Optiplex 755 – Intel(r) ICH8R/DO/DH SATA RAID Controller [This is using RAID 1]
       Dell Optiplex 755 – Intel(r) ICH9 SATA Controller [Non RAID Install]
  8. Now apply the driver to the second SATA controller
  9. Restart the computer, now enter the BIOS and change the SATA controller to AHCI mode
  10. Let it boot into Windows normally, If it crashes or fails to boot to Windows upon restart, boot back to BIOS change it back to ATA mode, then press F8 to get the windows boot menu and select Last Known Good Configuration. This should get you back in to Windows normally. Now restart the process at step 2, this time trying a different driver at step 6 and 7
  11. Done
  12. Read More

How to Use WMI Filtering to Improve Group Policy Administration

Group policy is one of the most versatile and powerful ways to manage your workstations in your domain. However, using just basic Group Policy to object relationship links you can limit the customization that is possible with group policy. Today I will show you how to add WMI (Windows Management Interface) Filtering to your group policy. This will allow you to build a kind of rule, and allow you to pick and choose which workstations get the policy and which don’t. My goal today is to apply my group policy to only workstations that start with the name of shs-exam. This is basically all the workstations that reside in our exam rooms and I would like them to have a special set of settings, however I want them to co-exist in my Active Directory structure in the proper ‘departmental’ organizational units that I already have.
Requirementswmi-query

Configuration

  1. Open your Group Policy Management Console and browse to WMI Filters in your Domain.
  2. Go ahead and Right Click on WMI Filters and select New
  3. Give the WMI Filter a nice descriptive name and give more detailed text in the Description if needed.
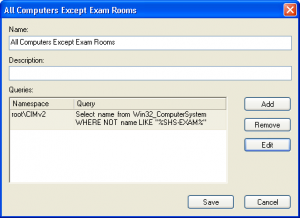
  4. To build your actual query for WMI you need to think of this as a question to ask the PC and if it returns any result then the Group Policy will be applied to it. The query I have built asks it to return name for the computer and if the name contains “SHS-EXAM” then it will return the name and get the group policy applied, if not then nothing happens and the group policy is skipped.
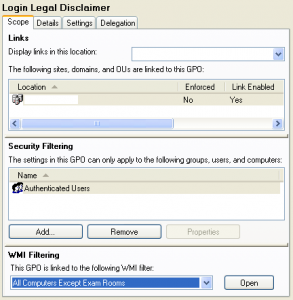
  5. group-policy-scope-wmi-filtering

  6. Add your WMI Query, mine is Select name from Win32_ComputerSystem WHERE NOT name LIKE “%SHS-EXAM%” This will basically select all computers that are not named “SHS-EXAM”
  7. Now press Save
  8. Now that we have successfully made the WMI Filter we need to apply it to the proper group policy, so go to your Group Policy Objects under your domain and select the one you wish to add the filter to.
  9. The last section on the screen should be WMI Filtering, just drop down the list and select the WMI Filter you just made

Reference Material

  • WQL (SQL for WMI) (Windows) – This is a great list of advanced operators and examples to get you close the the proper syntax
  • HOWTO: Leverage Group Policies with WMI Filters – This article explains in detail how to create a WMI filter to determine the scope of a Group Policy based on computer attributes.
  • Paessler WMI Tester – This tool can help you test your WMI queries before deploying them in Group Policy use. I use this tool all the time to help find information about a workstation.
  • Microsoft Win32 Classes Reference – This is a Microsoft’s reference for all of the objects and events for WMI. You can use this to find that specific settings you need to filter on.

Read More

How to Slipstream Drivers into a Windows Installation using nLite

Slipstreaming drivers in to your Windows installation can either make your Windows install super simple or just make it possible. Most modern SATA and RAID controllers need specific drivers for Windows to see and use the hard drive, and with most newer computers not having a floppy drive and most unable to use a USB attached one this leaves you to only option to add the correct driver to the CD using this slipstream technique. Besides adding hard drive controller drivers so you can install windows you can also add whatever other drivers you would typically install in Windows and put them in the install. Today I will be walking you though adding a RAID card driver to a Microsoft Windows 2003 Standard Edition installation.

Requirements

  • Microsoft Windows OS CD (2000,XP,2003 / Any Flavor)
  • nLite 1.4.9.1
  • RAID or SATA Driver needing to be added to your Windows Installation
  • Knowledge and Software to Burn an ISO image

Directions
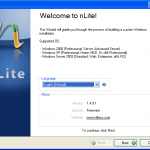
Get the nLite software installed and fire it up, the software is pretty much a glorified wizard, but I will still take you step by step though it.

  1. Select your language, I would suggest English in your case and press Next
       nlite-01
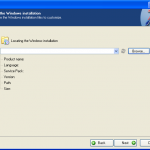
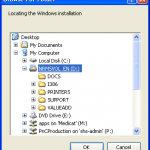
  2. Click Browse and use the Browse for Folders dialog box, now Select your CD-ROM drive that contains your Microsoft Windows CD, then click Next
       nlite-02   nlite-03
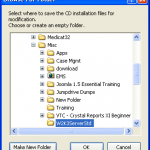
  3. Since you selected the CD in the first option, it should now Warn you and prompt you as to a Folder it can use to copy the files off the Windows CD and customize them in. I just made a folder in my Misc folder for this version of Windows
       nlite-04   nlite-05
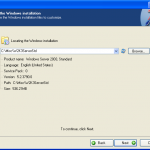
  4. Now you should see a progress bar box, it is coping the files from the CD to the directory you selected so they can be customized. Once finished it should identify your OS, now press Next
       nlite-06   nlite-07
  5. This screen would allow you to import a previous set of nLite settings if you had used it before, however we haven’t so just Next though this window
       nlite-08
  6. Now you can see all the different areas that nLite can customize to make your installation go easier, however we are only interested in adding some drivers so we can actually install Windows so select Drivers and Bootable CD because we want to be able to boot to the CD and maybe burn it at a later date, then press Next
       nlite-09   nlite-10
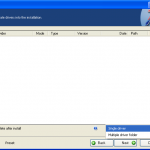
  7. You will now be presented with the Drivers screen which will allow you to add drivers to your installation. To add a driver click on the Insert button. It should give you a small menu asking you to Select Single Driver or a Multiple Driver folder, for our use we just need to add the one Single Driver so select that.
       nlite-11   nlite-12
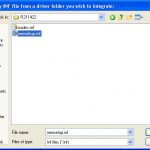
  8. It should prompt you to select the INF needed for the install, browse to where your driver is and select it.
       nlite-13
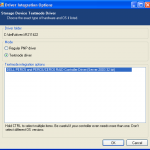
  9. Now it should identify what the driver is actually for and it asks you to select a mode. Regular PNP Driver should be used with devices that will be installed during the installation (network, video, sound), Textmode Drivers are loaded before the Windows installation starts, it is the equivalent of pressing F6 during the install and pointing to a floppy disk for the driver. This is mostly used for hard drive controllers, because Windows needs to know how to use the hard drive before it can install anything to it. Once you have selected the correct mode press OK
       nlite-14
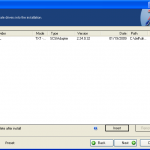
  10. If you need to add more drivers just repeat the last three steps of the process, we only need the one driver to see our new RAID controller so we will press Next and move on.
       nlite-15
  11. Since this was the only part of Installation we were customizing it now asks if we want to start the process of applying the changes, go ahead and press Yes. It will next present you with a quick little status screen about it integrating the drivers and provide you with a little summary. Once it has completed press Next
       nlite-16   nlite-18   nlite-19
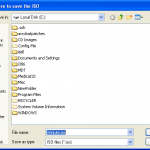
  12. Now it will provide you with a screen to Burn to a CD or Create an image, for this example we will create an image, this way I don’t have to repeat this process next time I want this driver on this CD. Go ahead and customize the label, this can help you remember what you added to this customized Windows installation, just leave the rest to default and click Make ISO, it will then prompt you as to where to save the CD/ISO image, once you have found a good location (I typically have a CD Images folder on my C: drive) then press Save
       nlite-20   nlite-21   nlite-24
  13. You should now be presented a progress bar box of it saving the ISO file to your Hard Drive. Once finished it should show you that it was created successfully. now you can press Next and Finish to close the nLite program.
       nlite-25   nlite-26
  14. The last step is a bit more independent of your setup, but run your favorite CD burning program and select Burn Image and direct it to the ISO image you just saved. This will create a bootable customized Windows CD that you can use to install your system
  15. Read More

How to Clone Disk Images using G4L in a Windows Environment

There are millions of workstations out in the world and I’m sure you have deployed your fair share of them. I recently received 25 brand new Dell Optiplex 760s to replace our GX270s that are getting close to the six year mark. I thought I would take this chance to document the process and share it.

Hardware Considerations
For the imaging process to work well you need PCs that have the same hardware, this makes it very simple to make an image for one PC and use it over and over again and get the same result every time. You can build an image on one model of PC then load it on a different one but it will most likely be missing drivers, but then if you load drivers and make a new image it will now support both types of computers. This won’t always work but it has with similar hardware like Dell Optiplex 740 / 745 / 755 / 760. I typically just have one type of image for each type of computer that I have, which just makes things simple.

Prerequisites
Before getting to far into this you will need to download and install an FTP server. You can put this on just about any workstation but keep in mind you will have to store disk images and it will be busy doing transfers when you are imaging PCs so you may want to make it a box that doesn’t do much. For an FTP server I would have to suggest Filezilla FTP Server, it runs on Windows fast, free and open source. For imaging software you will need to download the latest version of G4L or Ghost for Linux, you will need to burn the ISO image to a CD and use this a boot CD to backup or restore an image. Don’t let the Linux scare you, it has an easy to use menu that can allow anyone to image PCs.

Load PC to User Ready
Now that you have your batch of PCs, go ahead and load one up. Be sure to install software suites like Microsoft Office and any other utilities that may be necessary for you environment. You can join it to a domain however keep in mind it isn’t a good idea to join it to a domain then join it to a different domain depending on the settings you have, they may conflict.

Prepping a Windows Based Image for G4L
Once you have your PC happy with all the settings and software installed, start the clean up process. Go remove all Temporary Internet Files and History by going to Start > Control Panel > Internet Options, on the General Tab under Browsing history, click on the Delete… button, then Delete all.. at the bottom of the dialog box and confirm Yes. This will remove any browsing that you may have done while setting up the computer and loading drivers. Next, go to My Computer, right click on Local Disk (C:) go to Properties. Now on the General Tab, click on Disk Cleanup. Check all the items except Compress Old Files. Next go to the More Options tab and locate the System Restore Section and click on Clean Up and confirm the dialog box. This will remove any System Restore points that you don’t need and should free up some disk space. Press OK at the bottom and it should Clean Up the disk. Next do a defragmentation of the drive. You certainly don’t wanna be passing out new PCs with slow fragmented drives. You can just use the standard windows utility for that, since there shouldn’t be that much to fix. After that completes, you need to wipe the free space, the best tool that I have found for this is called Disk Redactor. Don’t let the cheezy website fool you, this is a good free tool that makes the free space empty. This is key because you don’t wanna backup an entire disk full of free space that has junk in it. It will make your disk image much larger than it needs to be. This part takes a while (depending on the size of your drive) so go find a nice cold beverage so you can be refreshed when it finishes. Once this finishes, Uninstall it, I can recall several times I have made images and accidentally left it installed. Trust me you don’t want your users calling you about it. Now it is Sysprep time, although sysprep is very powerful and can automate the windows setup, that is not the route we are going today. Simple always seems to be key for me. To install sysprep extract the sysprep version to C:\sysprep inside of there run sysprep.exe. I will warn you about SIDs and then give you some options. Click use mini-setup and click Reseal. Once the utility completes it will shutdown the PC.

Backing up an Image Using G4L
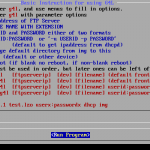
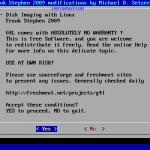
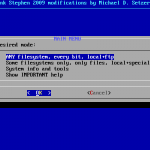
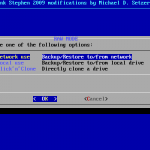
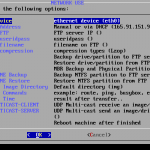
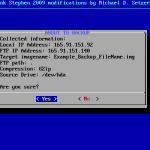
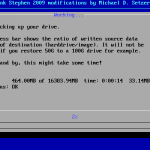
Power on the PC and insert the G4L CD and boot to it, either though a change in the bios or most Dell computers you can press F12 and get a boot menu. Once it has booted to CD you should receive a screen asking for which kernel just select the one that is highlighted by default. It should load two files then go in to awesome Linux boot script mode in which it detects the hardware just wait for this to finish. You should next receive some information about this project and the people behind it, just next on though it. A little more detection for network stuff and finally you should be presented with the G4L command line. Simply type G4L this will ask a few more things. Now, select Yes and accept the license agreement. Next, select RAW, this supports all file systems. Select Network Use because we want to copy the image to the FTP server. Lastly, fill out this screen based on your Network, you will need to specify the IP of the server for Config FTP as well as the username and password, Config useridpass, and a filename Config filename, change the compression to your preference I use Gzip but any one of these will do equally well. When naming the image you may want to consider putting parts of the computer model, OS, Service pack, or Hard Drive size, this will help in the future when you have 20 images and want to make sure you get the right one on the right workstation. When you have all your options in there select Backup and it will confirm your options with you one last time and then show you a progress bar. This part can take sometime to finish but once the image is uploaded you can start imaging it to other workstations. I have attached some screenshots of the G4L program so you can get a feel for where these items I talk about are located in the menu structure.

Restore an Image using G4L
To image a workstation boot to the G4L CD and go though the menus except select the Restore menu option instead of backup and it will transfer the image to the new workstation.

Read More
How to Setup a Legal Notice Before Login in Group Policy
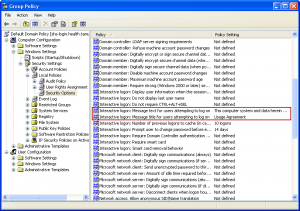
A few days ago I was tasked with setting up a notice to users before the actually log on to the computer to notify them that if they use this computer they agree to blah.. blah.. blah legal stuff. To solve this, I decided that this would be good to see on every computer we have in the organization so I added it to the Default Domain Policy, but this can be applied to users or computers at any level you see fit. This is a very easy setting that may also substitute for signing the computer usage agreements every year.

    legal-notice-group-policy-settings

  1. Open up your Group Policy Management Console (gpmc.msc)
  2. Go to the Group Policy Object in your domain, right click on Default Domain Policy and select Edit…
  3. Once the Group Policy Editor is up, using the treeview on on the left go to Computer Configuration > Windows Settings > Security Settings > Local Policies > Security Options
  4. To edit the title of the windows change: Interactive logon:Message title for users attempting to log on
  5. To edit the message text change: Interactive Logon:Message text for users attempting to log on

Read More